
In this post we’re going to explore how to use text shadows in Flutter. Text is a massive part of any application, and using shadows can make it look very stylish.
If you aren’t familiar with Flutter, then you can check out my Introduction to Flutter post here.
Project Setup
Okay, let’s get started! Create a new Flutter project:
# Create a new Flutter project
$ flutter create text_shadows && cd text_shadows

# Open project in VS Code
$ code .
Now, let’s create a new MaterialApp inside of main.dart so we can begin.
import 'package:flutter/material.dart';
void main() => runApp(MyApp());
class MyApp extends StatelessWidget {
Widget build(BuildContext context) {
return MaterialApp(
title: 'Text Shadows',
home: Scaffold(
appBar: AppBar(
title: Text('Text Shadows in Flutter'),
),
body: Center(
child: Text('Text Shadows in Flutter'),
),
),
);
}
}We’ve created a Text widget inside of the body, which is where we’ll be working within this project. Now, let’s supply a TextStyle to our Text widget. This will allow us to assign our Text widget with a text shadow.
Creating a TextStyle
body: Center(
    child: Text('Text Shadows in Flutter',
    textAlign: TextAlign.center,
    style: TextStyle(
        ),
    ),
),
As you can see, we’ve added the textAlign property to our Text widget with a value of TextAlign.center. This will align our text in the center of the screen. We’ve also supplied our TextStyle, but it’s currently empty. Let’s fix that by adding in our shadow.
Creating a Text Shadow
body: Center(
    child: Text('Text Shadows in Flutter',
    textAlign: TextAlign.center,
    style: TextStyle(
        shadows: [
            Shadow(
                blurRadius: 10.0,
                color: Colors.blue,
                offset: Offset(5.0, 5.0),
                ),
            ],
        ),
    ),
),
Okay! We can see that we’ve added our shadow as a property of TextStyle, and we’ve assigned the shadow properties such as blurRadius, color and offset. The blurRadius property will define the length of the shadow and how far it will be blurred, a larger number being a larger radius. The color property will define the color of the shadow, and the offset property will define the displacement of the shadow from the casting element (the text). The offset property will take in both x and y coordinates; positive coordinates will move the shadow to the right and down, while negative coordinates will move the shadow to the left and up.
That might be a lot to take in, but we’ll get the hand of it after a few examples. Let’s run our code and see what we get:
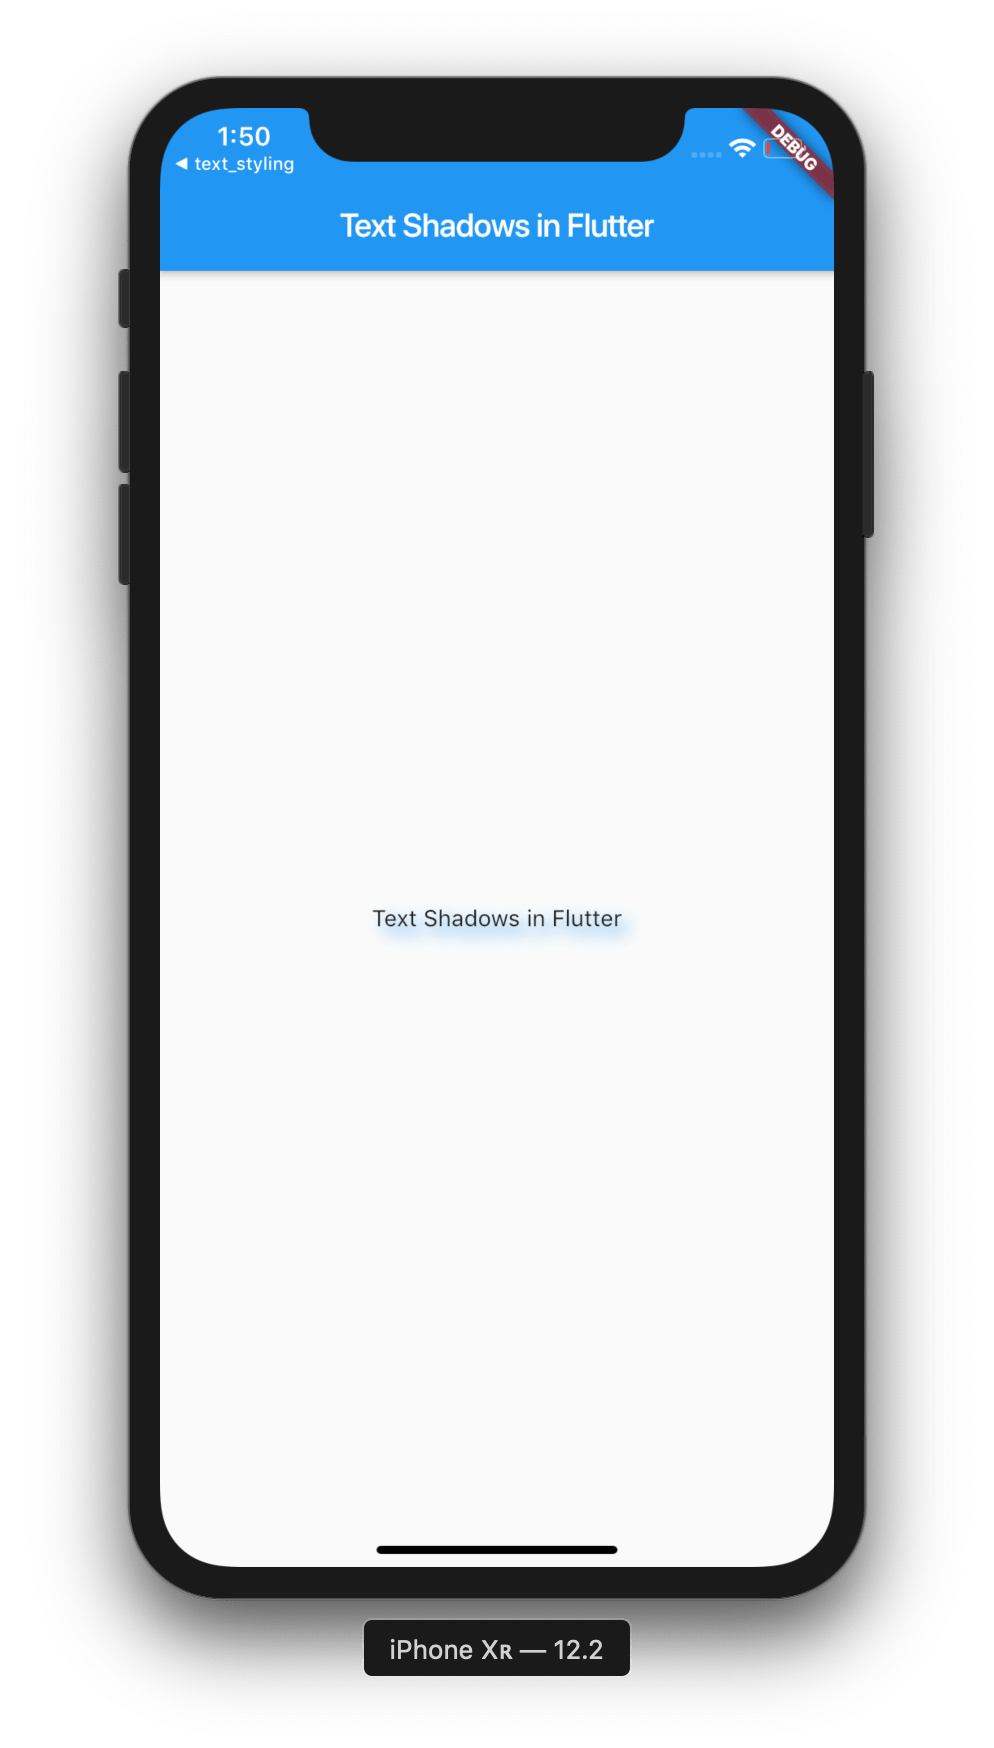
Hmm. We can see our shadow is working, but the text is way too small. Let’s add the fontSize property inside of our TextStyle in order to make it bigger:
style: TextStyle(
    fontSize: 60,
    shadows: [
        Shadow(
            blurRadius: 10.0,
            color: Colors.blue,
            offset: Offset(5.0, 5.0),
            ),
        ],
    ),
Now let’s check again and see if our text is updated:
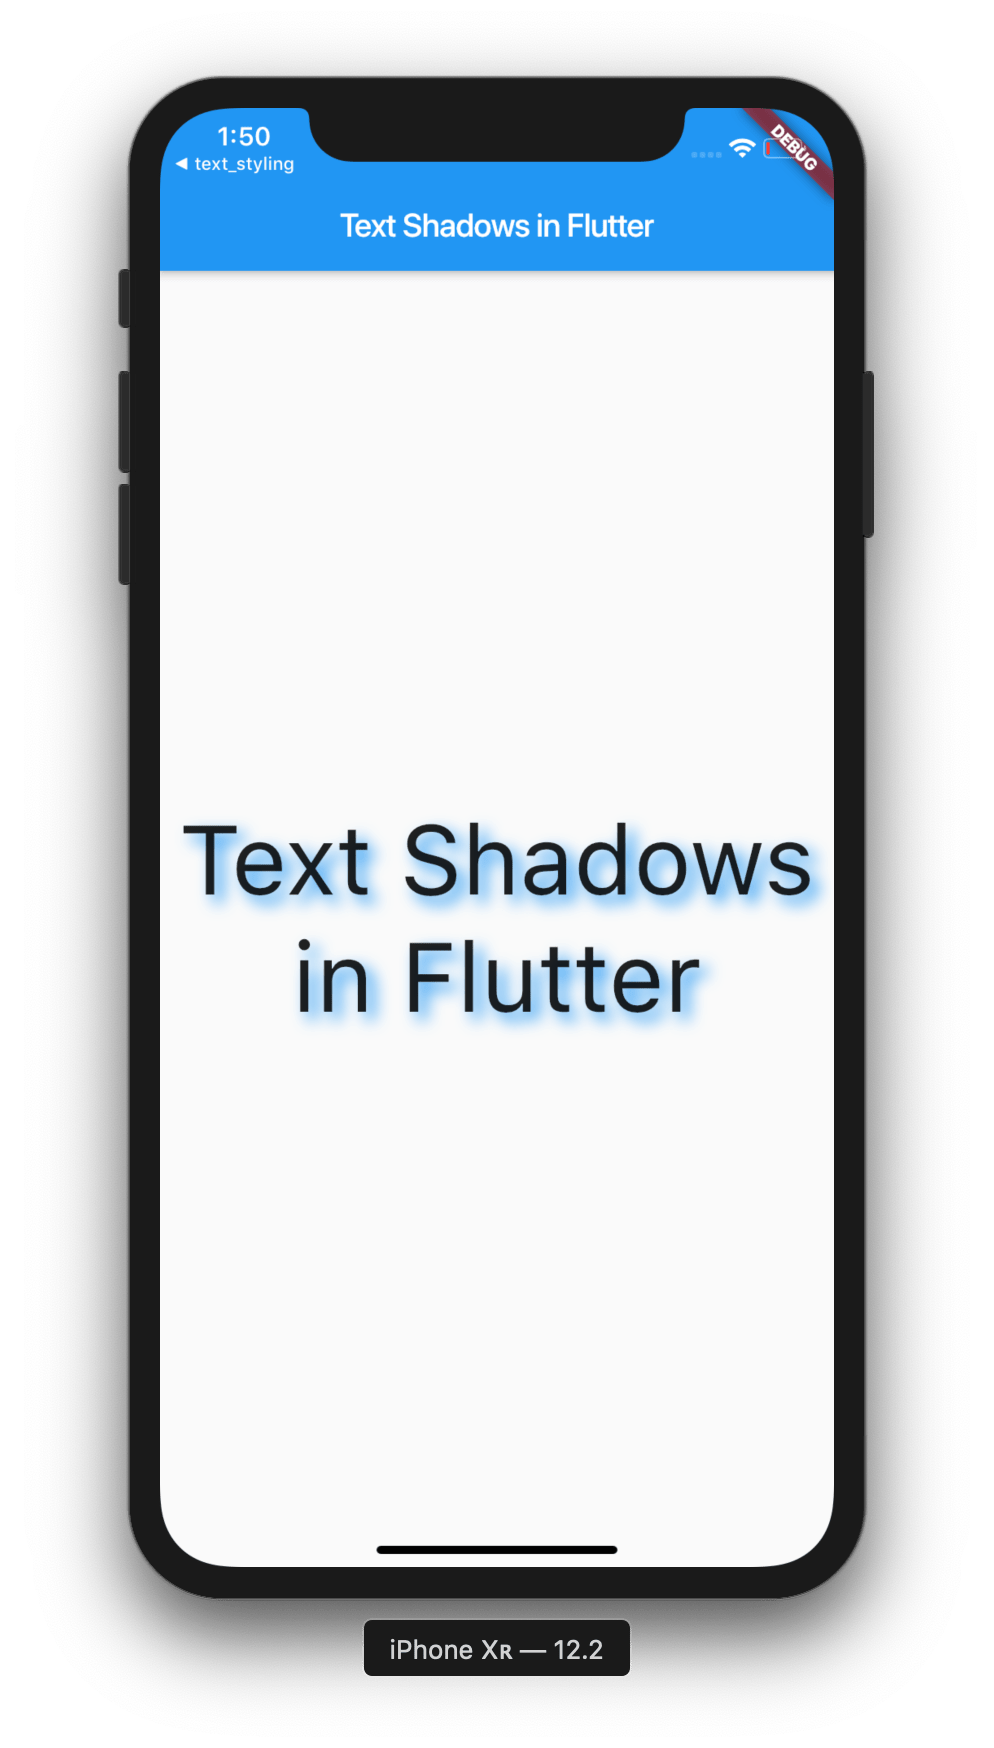
Great! We can see that our text shadow is fully working!
Multiple Shadows on a Single Widget
In Flutter, we can actually add multiple shadows to a single Text widget, and with different colors too! Let’s try that out:
style: TextStyle(
    fontSize: 60,
    shadows: [
        Shadow(
            blurRadius: 10.0,
            color: Colors.blue,
            offset: Offset(5.0, 5.0),
            ),
        Shadow(
            color: Colors.green,
            blurRadius: 10.0,
            offset: Offset(-10.0, 5.0),
            ),
        ],
    ),
Now we’ve added another shadow, with the color of green, let’s have a look what that gives us:
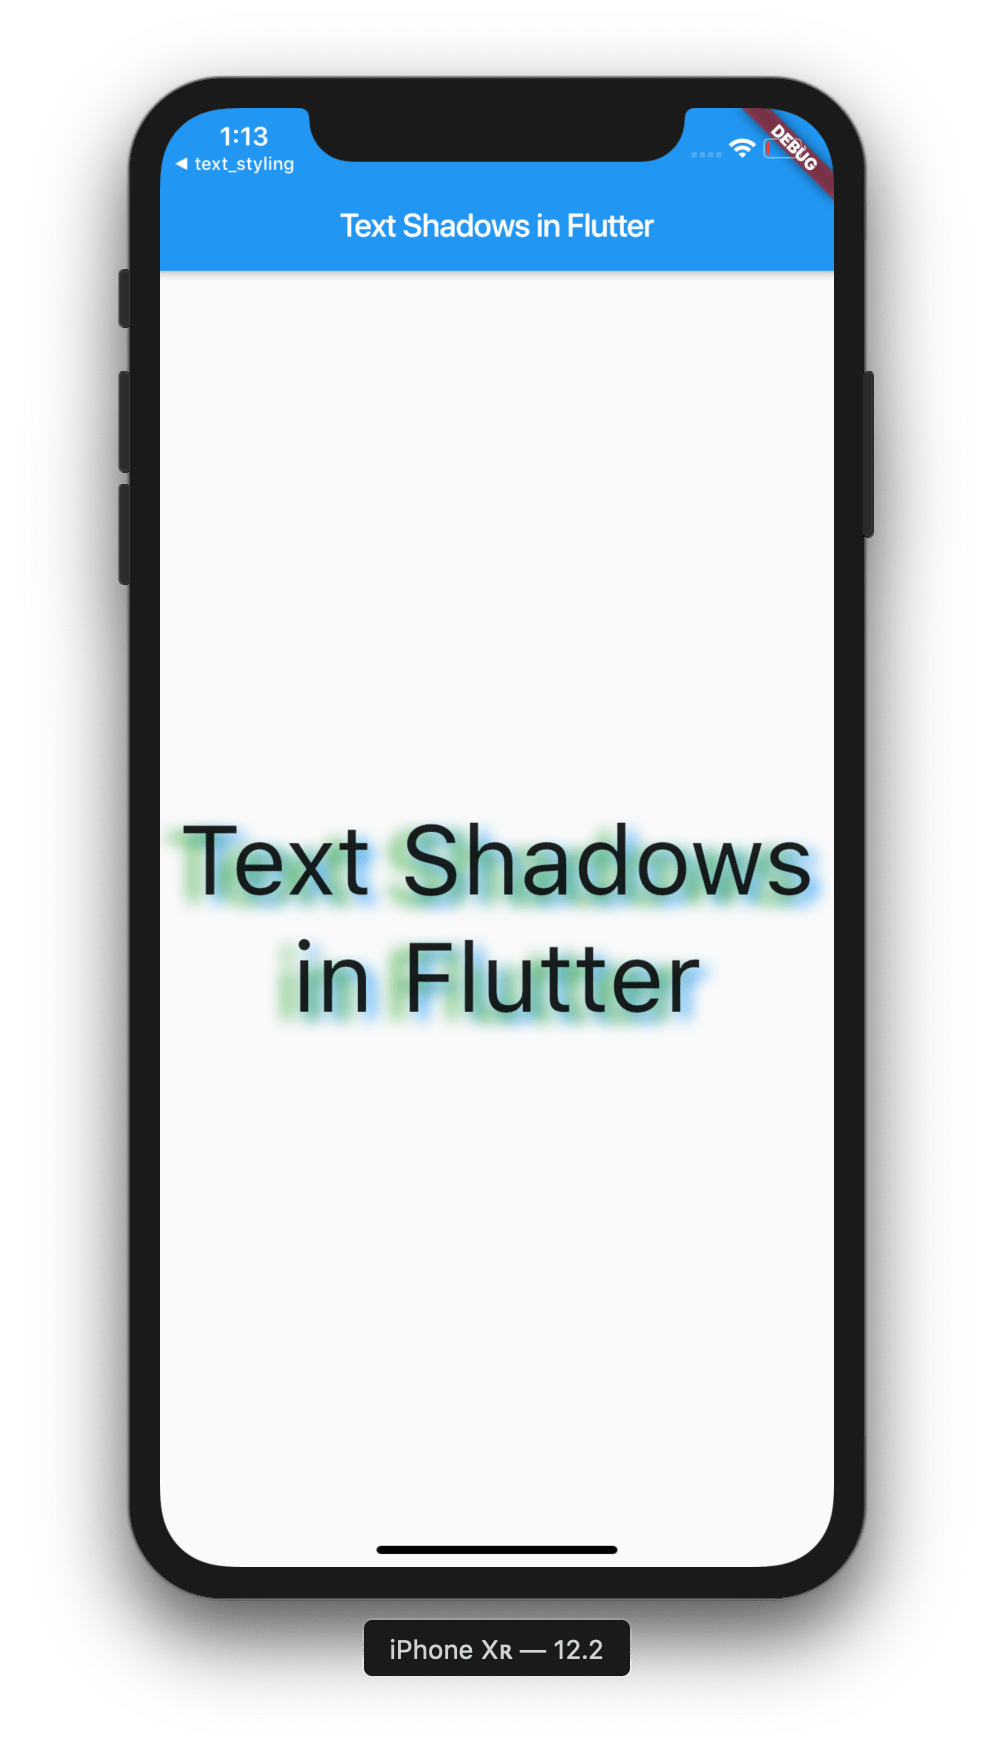
We now have multiple shadows on the same Text widget, replicating multiple light sources. Cool huh? We can experiment with all of the different properties to customise our shadows, but we’ll just leave it at that for now.
In this post we’ve learned how to apply a shadow to a Text widget, we’ve explored how to assign different properties in order to customise the shadow, and we’ve looked at how we can add multiple text shadows onto a single Text widget.
I hope you’ve taken a lot from this post, and don’t forget to subscribe for future Flutter content! <3
The source code for this project can be found here: https://github.com/ohalliday/flutter-shadows